Sample Work
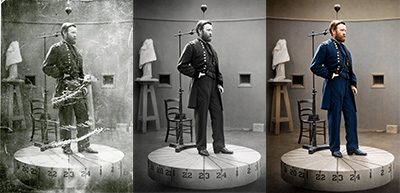
Before & After
See the difference professional restoration can make. Old photographs can be cleaned up, sharpened, color-corrected, and fully brought back to life.

Before & After — architectural photo restoration using Adobe Photoshop


Getting Started
What to bring to the table
The better the scan or photo you provide, the better the result. Here's what helps me do my best work on your photos.
The Original Photo
Scan the original print at the highest resolution possible — 600 DPI or higher is ideal. If you don't have a scanner, a sharp phone photo taken in good light works reasonably well. JPG, PNG, or TIFF files are all acceptable.
Description of Damage
Let me know what needs fixing — fading, tears, creases, water stains, missing areas, discoloration, or scratches. The more specific you are, the better I can plan the restoration approach and give you an accurate time estimate.
Color or Black & White
Would you like the restored photo to remain black and white, or would you like it colorized? Colorization of black and white photos is possible and can be a wonderful way to bring old family portraits to life.
Cropping & Framing
Let me know if you'd like the photo cropped differently, or if you want backgrounds cleaned up or removed. Sometimes a slight reframe makes all the difference in bringing focus to the subject.
Intended Use & Size
How will you use the restored photo? A digital file for sharing, a print for framing, or inclusion in a video tribute? Knowing the final use helps me deliver the right resolution and file format.
Timeline
When do you need the finished restoration? Rush projects may be accommodated depending on the workload and complexity — just ask. More complex restorations with missing areas or heavy damage naturally take more time.